Week 3: Google Photos, & Phone Apps Organization
Week 3 Goal: Organize photos in Google Photos with albums and organize mobile phone applications
Day 16 Task: Create albums in Google Photos
Welcome to Day 16! At this point, you’ve had the chance to move around in the Google Photos app and website so you could get familiar with them. Today, you’ll be creating your photo albums in the mobile app, which is super simple to do.
Overview of Google Photos
First, you’ll need to pull up the app and login to Google Photos if you aren’t already logged in. You should have already began the process of uploading your photos since that was discussed in Day 15.
Within the app, there are three tabs at the bottom, which are the photos, search, and library tabs. When you click on the photos tab, this is where you will find all the photos that were uploaded from your phone’s gallery, during yesterday’s assignment.
At the top of the photos tab you will see various “memory style” photos the app automatically puts together for you based off your uploaded photos.
On the search tab, you will be able to quickly search for certain photos. You can search by people/pets, places, and things also known as common events and objects.
Down in the “categories” section of the search tab, will be even more defined types of photos that were uploaded from your phone gallery. For example, screenshots, selfies, and videos. The app automatically categorizes the types of photos and videos you upload.
On the library tab, this is where you will find your print store, which gives you options on creating various prints. This is also where you will find your albums which is where you will spend most of your time today, to create your various albums. I love to use albums for all of my pictures because it helps me find photos so much easier.
Benefits of Using Albums in Google Photos
- free up space on your phone, which will also help speed up the performance of your phone
- categorize your photos by type (vacations, graduations, family reunions, birthday parties, various celebrations, weddings, etc)
- keeps your photos organized
- access your photos from any device as long as you have internet access
- easily share your albums with others
- back up & sync your photos
Once you have your entire library of photos from your phone gallery uploaded to google photos, you can actually have the app delete all the photos on your phone. This step is not required but I do recommend it if you want/need to free up space on your phone. CAUTION: Read this document on How to Free Up Space before you delete any of your photos to make sure it will work in your specific situation. Your current phone and photo settings need to be considered before anything is deleted.
Should you determine your photos can successfully be deleted from your phone gallery and you decide to delete them, remember, there really is no need to keep all the photos on your phone gallery since they are going to be stored in the app. Regardless of whether you are accessing your photos from the app or from the website, you will see your photos in both places. This is because they are tied to your google account and not your specific device.
Creating Albums in Google Photos
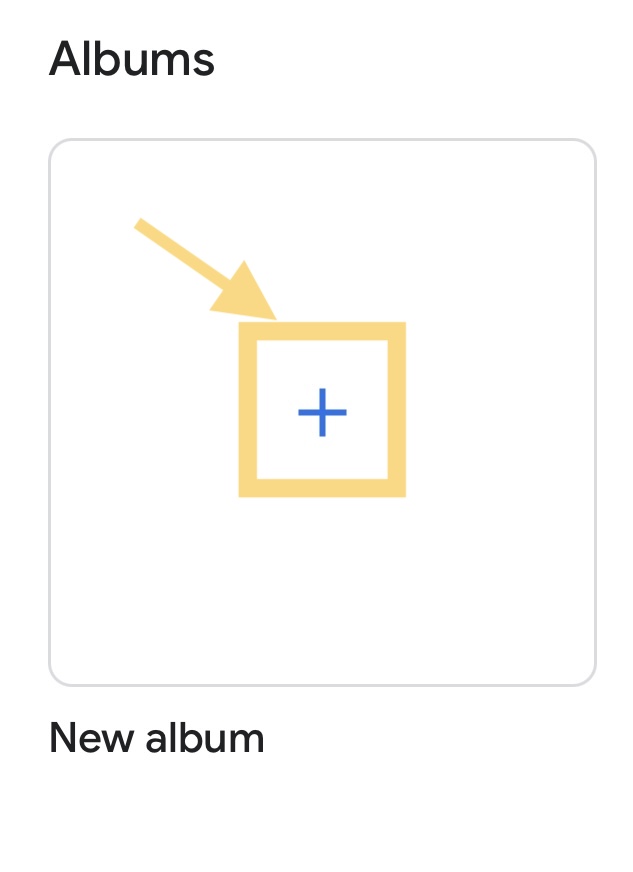
From the photos tab, click the + symbol for ‘new album’.
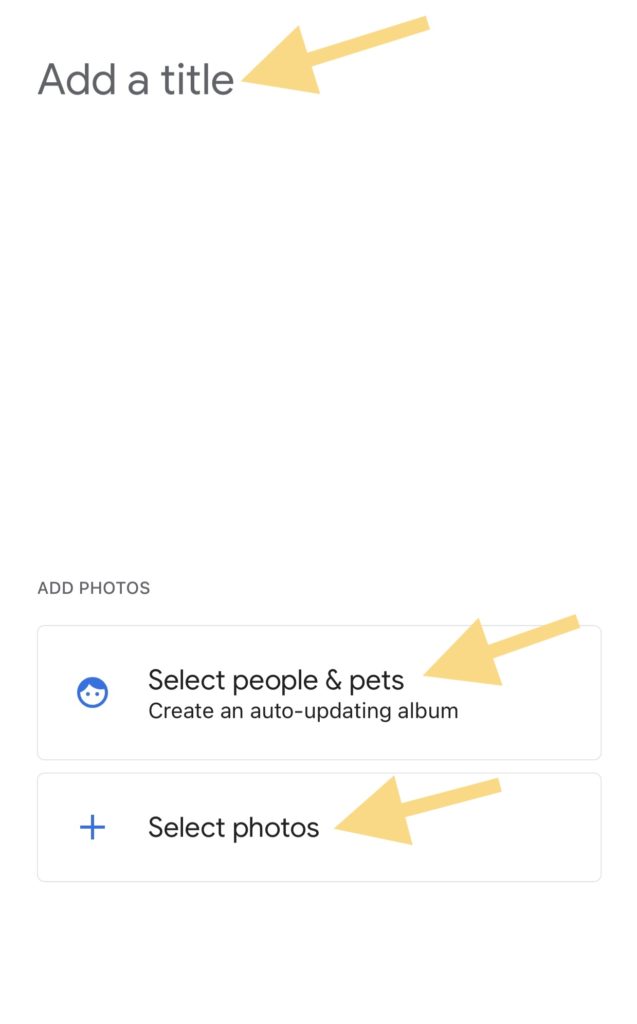
On the next screen, you’ll want to select a title for your new album so click in the ‘Add a title’ area to add your title. For practice purposes, create your first title called “Family”. From here you can then add your photos of some family members one of two ways. You can choose the ‘select people & pets’ option which will create an auto-updating album for you whenever you add photos with any of the faces of the people and pets you add to this section.
The other way you can add photos is by choosing the ‘select photos’ option. This is the way I would recommend you add your photos. Doing it this way gives you the flexibility of choosing which photos you want added to each album, instead of the app dropping every photo you have of a certain person being dropped into the same album repeatedly.
Repeat these steps for each album you want to create. Even if you create albums in the app, you will still be able to access them from the Google Photos web version and vice versa.
Moving your photos into albums can take some time. To cut down on the time it will take, I would suggest you go ahead and delete any duplicate photos or low quality photos that you don’t want to keep. That way, you’ve already taken care of those photos before you begin the process of moving your photos into albums. Remember, once you do it this one time, you will then only need to maintain your albums going forward.
Making Edits to an Existing Album
If you ever need to make any changes to an album after you’ve created it, just open the album and click the 3 dots in the upper right corner. You will then see the editing options available to you. For example, if you want to change the name of the Family album you just created to another name, this is where you would go to make that change. Another example, is if you want to change the album cover photo, this is where you would go to make that change.
That is all for today’s assignment! Have fun organizing your photo memories.